Install & first run
Three steps: install, open past the Gatekeeper warning, grant permissions. About three minutes total.
Install
Via Homebrew
brew tap mekedron/tap
brew install --cask clipslop
Via the DMG
Grab the latest .dmg from Releases and drag ClipSlop.app to your Applications folder.
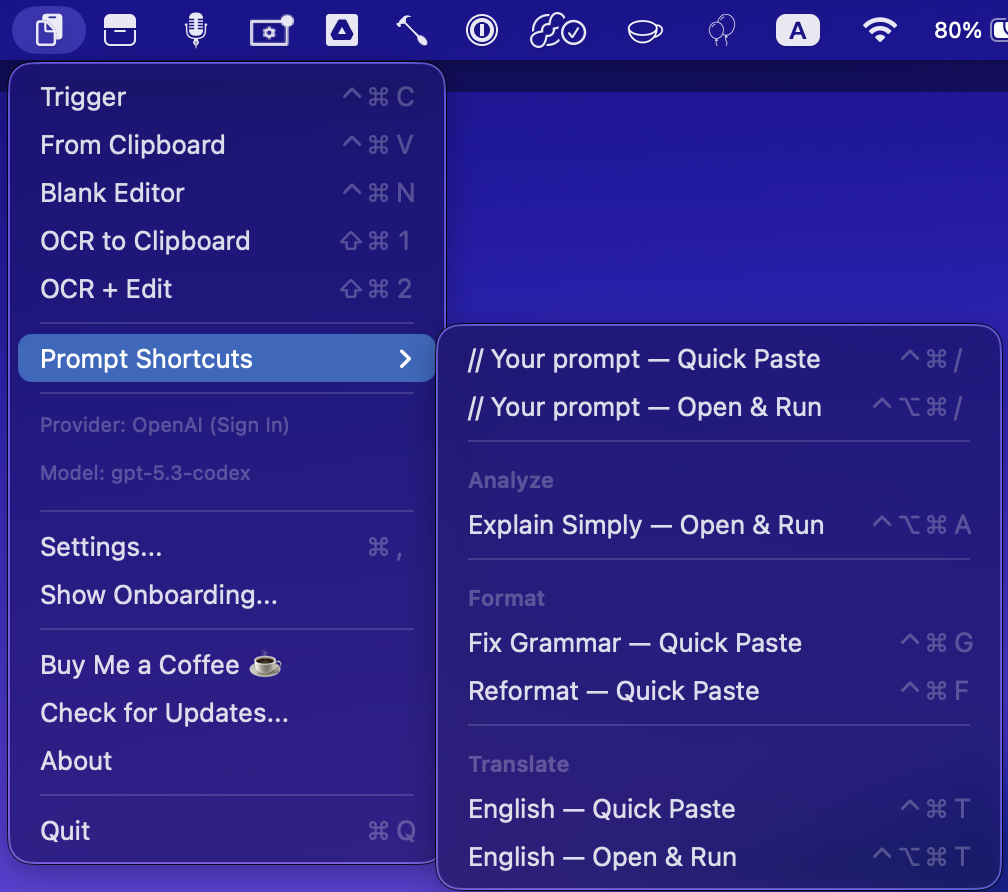
After install, ClipSlop lives in your menu bar:
Opening the app for the first time
Drag ClipSlop.app to your Applications folder and double-click. It opens straight away — ClipSlop is signed with an Apple Developer ID and notarised by Apple, so there's no Gatekeeper warning to click through.
The app is safe, and you can verify that independently: the source is fully open, and every release is built and signed by GitHub Actions directly from the public repository. To check the copy you downloaded:
spctl -a -vvv -t exec /Applications/ClipSlop.app
# ClipSlop.app: accepted
# source=Notarized Developer ID
Grant permissions
ClipSlop needs two macOS permissions to work in any app:
- Accessibility — required to read the text you've selected and paste results back. Grant in System Settings → Privacy & Security → Accessibility.
- Screen Recording — only needed for the OCR feature (
⇧⌘2). Grant in System Settings → Privacy & Security → Screen Recording.
After updating to a new version
Nothing to do. Because releases are signed with a stable Developer ID, macOS keeps your Accessibility and Screen Recording grants across updates.
Continue with Pick a provider — ClipSlop calls a real AI model for every transformation, so you need at least one provider configured.